Phone:
(701)814-6992
Physical address:
6296 Donnelly Plaza
Ratkeville, Bahamas.
Phone:
(701)814-6992
Physical address:
6296 Donnelly Plaza
Ratkeville, Bahamas.
Unfinished kitchen cabinets offer a blank canvas, and a serious opportunity to save money while customizing a kitchen’s look. Pre-finished cabinets often cost 30–50% more than their unfinished counterparts, making paint the most cost-effective route to a custom finish. But raw wood demands proper prep and technique. Skip a step, and paint will peel, chip, or show every brushstroke within months. This guide walks through the complete process, from sanding bare wood to applying a durable topcoat, so the finished product rivals factory work without the factory price tag.
Unfinished cabinets, typically made from poplar, oak, maple, or birch, arrive sanded but unsealed. That bare wood soaks up paint differently than pre-primed surfaces, which means the painter controls the entire finish schedule. The payoff? Complete color freedom, custom sheen levels, and significant cost savings.
A standard 10×10 kitchen with unfinished cabinets runs roughly $1,500–$3,000 less than the same layout in factory-finished boxes. Paint, primer, and supplies add $150–$300 depending on quality and color, leaving hundreds, or thousands, still in the budget. Beyond price, unfinished stock allows for immediate installation and painting on-site, cutting lead times that often stretch weeks for custom finishes.
The trade-off is labor. Painting unfinished cabinets isn’t a Saturday afternoon project, it requires methodical prep, multiple coats, and drying time. But for homeowners comfortable with a roller and patient enough to let primer cure, the result is a truly custom kitchen at a fraction of retail cost.
Gathering the right supplies upfront prevents mid-project hardware store runs and ensures consistent results.
Materials:
Tools:
A paint sprayer (HVLP or airless) speeds the job and eliminates brushstrokes, but adds cleanup time and requires proper ventilation or outdoor workspace. For most DIYers, a quality brush-and-roller combo delivers excellent results with less hassle.
Unfinished cabinets arrive factory-sanded to around 150-grit, but that’s rarely smooth enough for paint. Raised grain, mill marks, and minor scratches telegraph through thin coats, so additional sanding is non-negotiable.
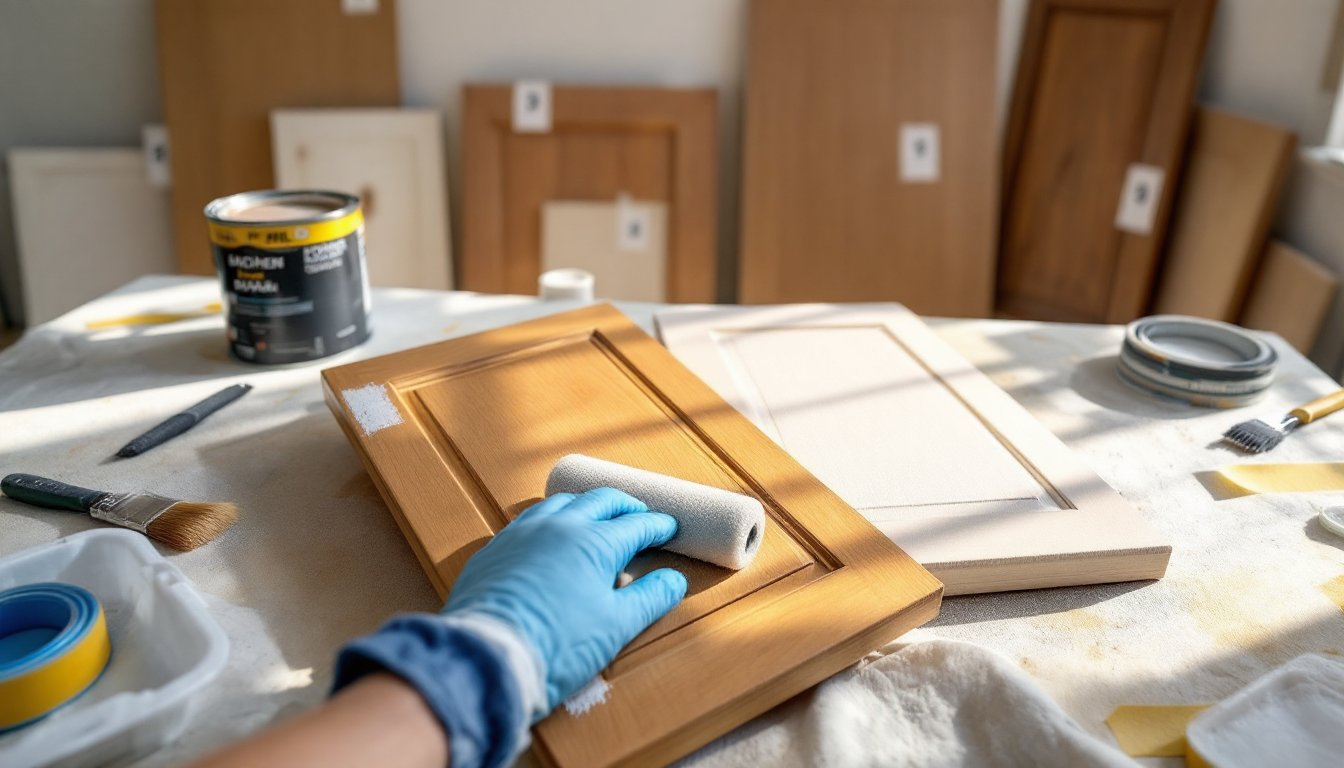
Start by removing all doors, drawer fronts, and hardware. Label each piece with painter’s tape and a number corresponding to its location, unfinished cabinets can vary slightly in fit. Work in a well-ventilated space or outdoors if possible.
Sand all surfaces with 120-grit sandpaper using a random orbital sander or sanding block, moving with the grain. Focus on face frames, door panels, and any routed edges where factory sanding may have missed. Wipe down with a tack cloth to remove dust.
Next, apply a light mist of water with a spray bottle to raise the wood grain, then let it dry for 30 minutes. This step prevents grain from lifting after primer is applied. Once dry, sand again with 180-grit to knock down the raised fibers. The surface should feel glass-smooth.
Fill any nail holes, dents, or gaps with wood filler, let cure per manufacturer instructions (usually 1–2 hours), then sand flush with 220-grit. Final wipe-down with tack cloth ensures no dust remains, it will show up in the paint if left behind.
Primer serves three critical functions on raw wood: it seals porous grain, blocks tannin bleed-through, and creates a uniform base for paint adhesion.
For oak or woods with visible tannins, use a shellac-based primer like BIN. It dries in 45 minutes and locks in staining compounds that can yellow white or light-colored paints. For poplar, maple, or birch, a high-quality water-based primer works well and cleans up easier.
Apply primer with a foam roller for flat surfaces and a 2″ angled brush for edges, grooves, and detailed areas. Work in thin, even coats, heavy application causes drips and extends dry time. Let the first coat dry fully (check the can: usually 1–2 hours for water-based, 45 minutes for shellac).
Inspect for bleed-through, rough spots, or missed areas. Lightly sand with 220-grit, wipe clean, then apply a second primer coat. Two coats of primer are standard for unfinished wood, especially on doors and drawer fronts that see heavy use. Skipping the second coat often results in uneven paint absorption and a blotchy finish.
With primer cured and surfaces prepped, the painting phase moves quickly, but precision still matters.
1. Stir paint thoroughly. Don’t shake the can: it introduces bubbles. Stir for 2–3 minutes to fully incorporate pigments.
2. Cut in edges and details first. Use the angled brush to paint door frames, routed edges, and any areas the roller can’t reach. Brush with the grain to minimize visible strokes.
3. Roll flat surfaces. Load the foam or microfiber roller lightly, excess paint causes runs. Apply in smooth, overlapping passes, maintaining a wet edge to avoid lap marks. On raised-panel doors, roll the flat panel first, then brush the profiled edges.
4. Work in sections. Paint all doors, then drawer fronts, then cabinet boxes. Keeping components grouped by type ensures consistent technique and drying schedules.
5. Allow full cure time between coats. Most acrylic-alkyd paints dry to the touch in 1–2 hours but need 4–6 hours (or overnight) before recoating. Rushing this step traps solvents and leads to soft, easily damaged paint.
6. Lightly sand between coats. After the first paint coat dries, gently scuff with 220-grit sandpaper or a fine sanding sponge. This levels any dust nibs or brushstrokes and improves adhesion for the next layer. Wipe clean with a tack cloth.
7. Apply a second coat (and third if needed). Two coats over primer usually suffice for full coverage, but deep colors or high-contrast shifts (dark wood to white) may require a third. Inspect in natural light to catch thin spots.
For a factory-smooth finish, some DIYers wet-sand the final coat with 320-grit and water after it’s fully cured, then buff with a clean cloth. This extra step is optional but erases minor imperfections.
Paint alone offers decent durability, but kitchen cabinets endure grease splatters, moisture, and constant handling. A clear topcoat extends the life of the finish and makes cleaning easier.
Choose a water-based polyurethane or polycrylic in satin or semi-gloss sheen. Oil-based poly adds warmth but yellows over time, fine for cream or beige, problematic for bright white. Apply one or two thin coats with a foam roller or fine-bristle brush, following the same technique used for paint. Allow 2–3 hours between coats and a full 24-hour cure before handling.
Once the topcoat is dry to the touch (usually overnight), reinstall hardware and reattach doors. Use a screwdriver or drill and check alignment, unfinished cabinets sometimes shift slightly during handling. Adjust hinges as needed for uniform gaps and smooth operation.
Avoid closing cabinet doors fully or placing items inside for 72 hours after the final topcoat. Paint and poly continue to cure and harden during this period: premature use can cause sticking or marring.
The result? A custom, durable finish that rivals pre-finished cabinetry, at a fraction of the cost and on the homeowner’s timeline. With proper prep and patience, painted unfinished cabinets deliver years of service and a kitchen that looks anything but budget.