Phone:
(701)814-6992
Physical address:
6296 Donnelly Plaza
Ratkeville, Bahamas.
Phone:
(701)814-6992
Physical address:
6296 Donnelly Plaza
Ratkeville, Bahamas.
Replacing kitchen cabinets can drain five to fifteen thousand dollars from a budget fast. Painting them costs a fraction of that, usually under $300 for a DIY job, and delivers a dramatic transformation in a long weekend. The process isn’t difficult, but it does require patience and proper prep work. Skip the degreasing or rush the primer, and the finish will chip within months. This guide walks beginners through every step, from choosing the right paint to avoiding streaky topcoats, so the results look factory-fresh instead of homemade.
Cabinet replacement involves demolition, new box installation, hardware adjustments, and often plumbing or electrical modifications. A full replacement typically runs $5,000 to $15,000 depending on kitchen size and material grade. Painting existing cabinets costs $200 to $400 in materials for a standard 10×10 kitchen.
Beyond cost, painting preserves solid wood or plywood cabinet boxes that still have decades of life left. Many older cabinets feature face-frame construction with dovetailed drawers, better built than modern particleboard alternatives. If the boxes are square, the doors hang properly, and the drawer boxes are solid, paint gives them a second life.
The project also lets homeowners control the timeline. Cabinet orders can take 8 to 12 weeks, plus installation time. Painting happens over a weekend or two, depending on the number of doors and drawers. There’s no need to live without a functional kitchen for weeks.
One caveat: if cabinet boxes are water-damaged, delaminating, or structurally unsound, paint won’t fix that. It’s a cosmetic upgrade, not a structural repair.
Materials:
Tools:
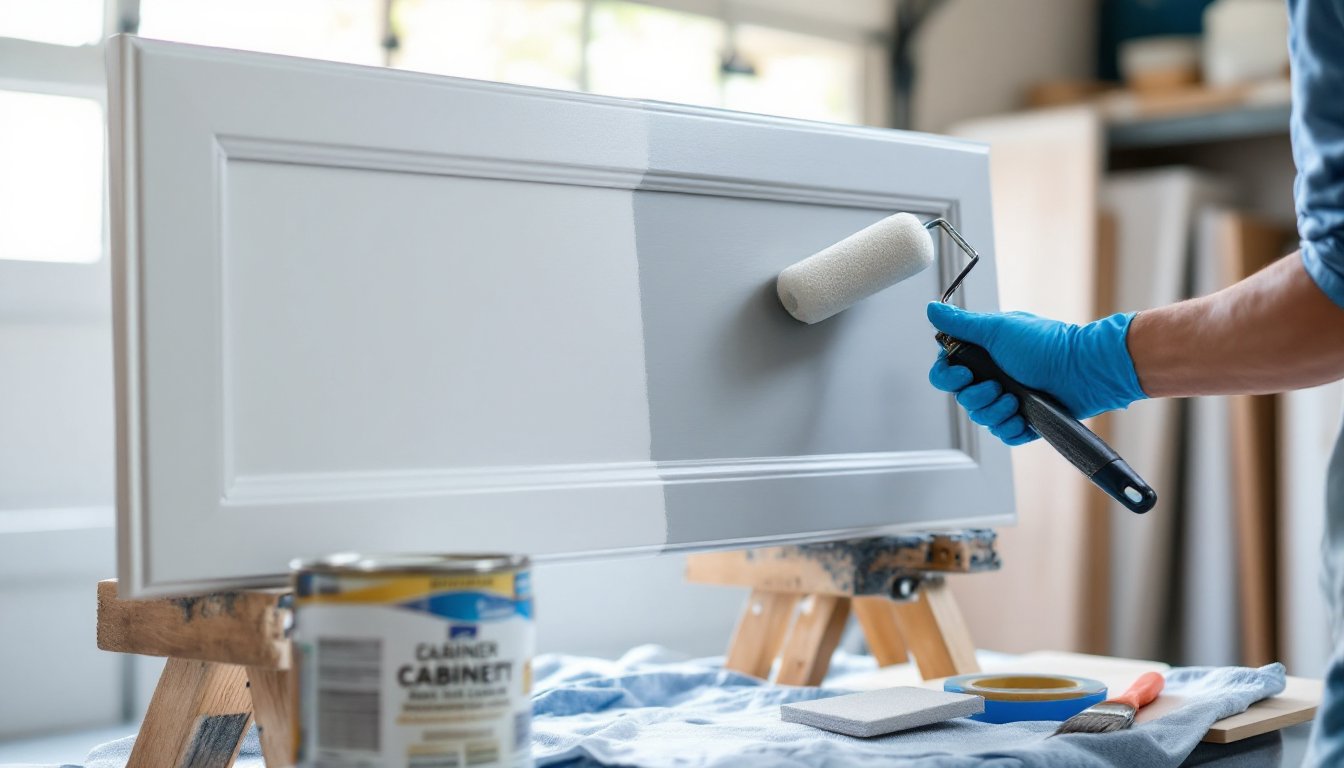
A paint sprayer produces factory-like results but requires practice and proper ventilation. Foam rollers work well for flat doors: they minimize texture compared to standard nap rollers. Brushes leave marks on large surfaces, so reserve them for trim and tight spots.
Safety gear: Respirator mask (especially with oil-based products or spraying), safety glasses, nitrile gloves, and adequate ventilation. Oil-based primers and paints release VOCs: open windows and use fans.
Prep work determines whether the paint lasts two years or twenty. Most beginners underestimate this phase and pay for it later.
Kitchen cabinets accumulate a sticky film of cooking oil, grease, and grime. Paint won’t bond to grease.
Sanding creates a mechanical bond for the primer. The goal isn’t to strip the finish, just to scuff it.
This step is tedious but non-negotiable. Skipping primer or light sanding between coats results in a rough, amateurish finish.
Once prep is complete, the actual painting goes quickly.
Pro tip: Paint doors and drawer fronts first, then tackle cabinet boxes. Doors are the focal point: if mistakes happen, better they occur on the less-visible frames.
When to spray vs. roll: Spraying is faster and smoother but requires masking everything nearby and practicing technique. Rolling takes longer but offers more control for beginners. On detailed, raised-panel doors, spraying wins. On flat slab doors, a foam roller delivers excellent results.
Skipping the degreaser. Grease causes primer and paint to peel. Always degrease, even if cabinets look clean.
Using the wrong paint. Standard wall paint isn’t durable enough for cabinets. Use cabinet-specific paint or a hard-wearing acrylic-alkyd hybrid. These formulas self-level and resist chips better than standard latex.
Painting in high humidity. Moisture slows drying and can cause a cloudy finish. Aim for 40–60% humidity and temperatures between 50–85°F. Avoid painting on rainy days in an unheated garage.
Reassembling too soon. Paint that feels dry isn’t necessarily cured. Wait at least 24 hours before rehanging doors, and avoid heavy use for a week. Early handling leaves fingerprints and dings.
Not sanding between coats. Even pros sand lightly between coats. It removes dust nibs and creates a glass-smooth finish.
Overloading the brush or roller. Thick paint application looks goopy and takes forever to dry. Thin coats dry faster, level better, and build up to a more durable finish.
Ignoring the cabinet interiors. Painting the inside isn’t necessary, but the edges where doors close should match. Bare wood edges look unfinished.
Forgetting ventilation. Oil-based primers and paints produce strong fumes. Use a respirator mask rated for organic vapors, and run fans to exhaust air outdoors. Don’t rely on a dust mask, it won’t filter VOCs.
By avoiding these pitfalls, beginners can achieve a professional-looking finish without hiring out. The process takes patience, not expert-level skill. Proper prep, quality materials, and adequate drying time make the difference between cabinets that look hand-painted and cabinets that look custom.